Balance - The Big Eyed Bird Unit
Student Examples:
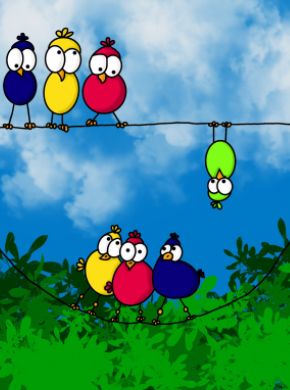
|
Liam F.
|
Delilah P.
|
Sadie S.
|
Day 1: Drawing the Sketch of the Birds
Learning Target:
- I can draw birds on a wire.
To Do:
1. Open sketchbook to a blank page. Turn Portrait.
2. Watch & follow along with the instructional video.
3. Using a pencil, draw the two sets of birds.
4. Take a picture in the Graded sketchbook.
Learning Target:
- I can draw birds on a wire.
To Do:
1. Open sketchbook to a blank page. Turn Portrait.
2. Watch & follow along with the instructional video.
3. Using a pencil, draw the two sets of birds.
4. Take a picture in the Graded sketchbook.
Day 2: Drawing the Birds on the iPad
Learning Target:
- I can trace the sketch of my birds in Procreate.
To Do:
1. Watch instructional video & follow along.
2. Open Sketchbook to bird drawing.
3. Take a picture of your birds.
4. Open Procreate.
5. Insert photo of birds from Photos area.
6. Change opacity to a lighter view.
7. Add a layer. (this will be the drawing layer)
8. Trace your drawing.
9. Make sure all lines are touching & clean up any overlapping lines.
10. Go to Layer 2 and turn on Reference.
11. Go to Layer 1 and turn off the layer by click on the check box.
Day 3: Color Drop & Adding Value
Learning Target:
- I can drop color into my drawing.
To Do:
1. Watch the instructional video.
2. (Layer 1) Make sure Reference is checked.
3. Create a layer for every color you use and drop color into your picture.
4. Do not add a background color or environment.
5. Begin to add gradient (value - Noise Brush) to each color.
6. Share both to Google Drive as a Procreate.
Learning Target:
- I can add value shading to my artwork.
To Do:
1. Watch the instructional video & follow along.
2. Open the bird project in Procreate.
3. For each layer with color, turn on Alpha Lock.
4. Turn off all color layers except the one you are working on.
5. Hold finger down on color to color select; adjust color to darker color for shading.
6. Add shading (value) to each color section.
7. Repeat this on every layer that has color including the white eye layer.
8. Share to your Google Drive as a Procreate file.
Learning Target:
- I can drop color into my drawing.
To Do:
1. Watch the instructional video.
2. (Layer 1) Make sure Reference is checked.
3. Create a layer for every color you use and drop color into your picture.
4. Do not add a background color or environment.
5. Begin to add gradient (value - Noise Brush) to each color.
6. Share both to Google Drive as a Procreate.
Learning Target:
- I can add value shading to my artwork.
To Do:
1. Watch the instructional video & follow along.
2. Open the bird project in Procreate.
3. For each layer with color, turn on Alpha Lock.
4. Turn off all color layers except the one you are working on.
5. Hold finger down on color to color select; adjust color to darker color for shading.
6. Add shading (value) to each color section.
7. Repeat this on every layer that has color including the white eye layer.
8. Share to your Google Drive as a Procreate file.
|
Step 3 - Color Dropping
|
Step 4 - Adding Value
|
|
|
|
Day 4: Creating an environment & using an environment from royalty free stock pictures.
Learning Target
- I can create an environment & find an environment for my bird project.
To Do:
1. Watch both tutorial videos and complete each step.
2. Create a simple environment following the instructions on the tutorial. (Name it BB1)
3. Find an environment following the instructions on the tutorial. (Name it BB2)
4. Save (Share) both bird projects as a jpeg in your Google Drive.
5. Insert both pictures on the slide attached and turn in.
|
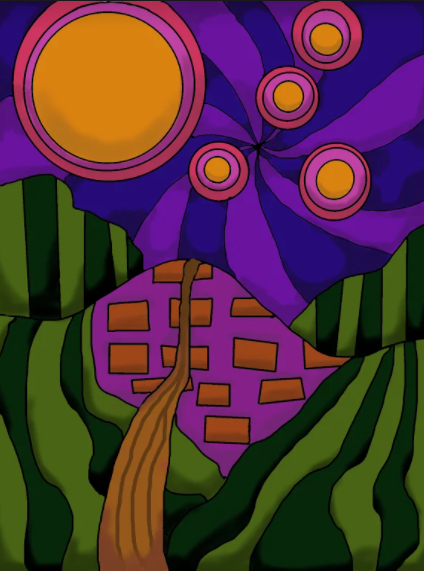
Environment - Created by student
|
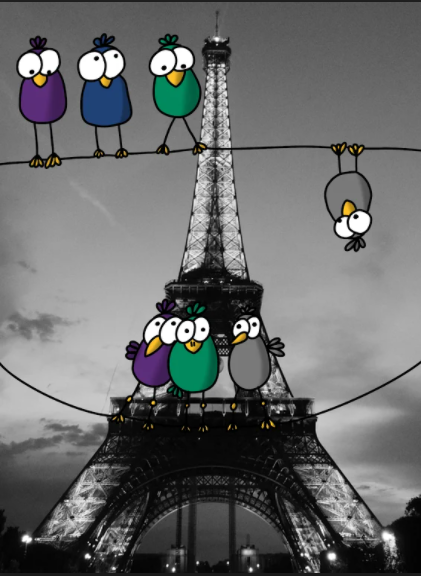
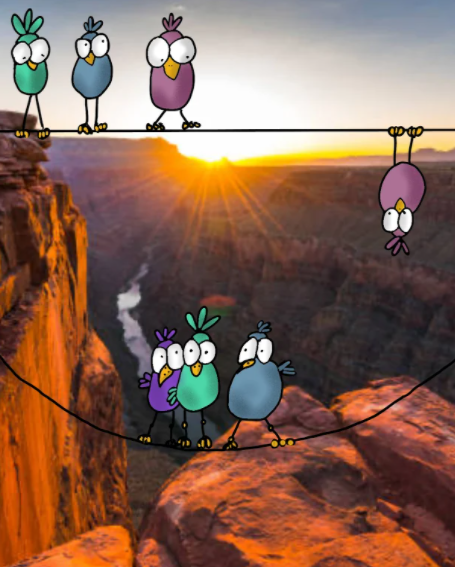
Found Environment - Royalty Free Stock Picture
|
|
|
|