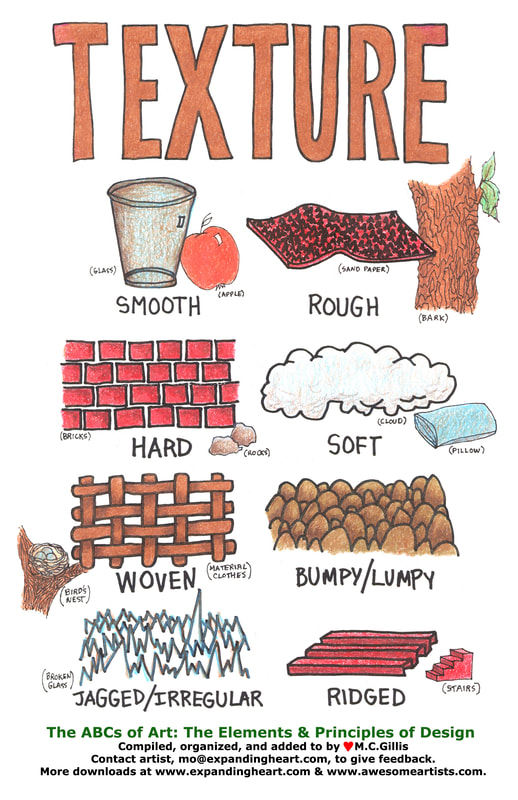
Texture
Videos:
6 Different Textures created using lines and shapes.
Drawing Wood Texture
How to Create Realistic Textures
Vocabulary:
Texture – In terms of art, texture refers to the way an object feels to the touch or looks as it may feel if it were touched.
3-D Texture – Physical and tactile texture on an object.
2-D Texture (Visual Texture) – The illusion of how an object would feel if it could be physically touched.
Simulated Texture – Texture that is created in order to simulate “real-life” texture of objects.
Invented Texture – Texture that is created using a 2-D pattern of shapes and lines.
Assignments:
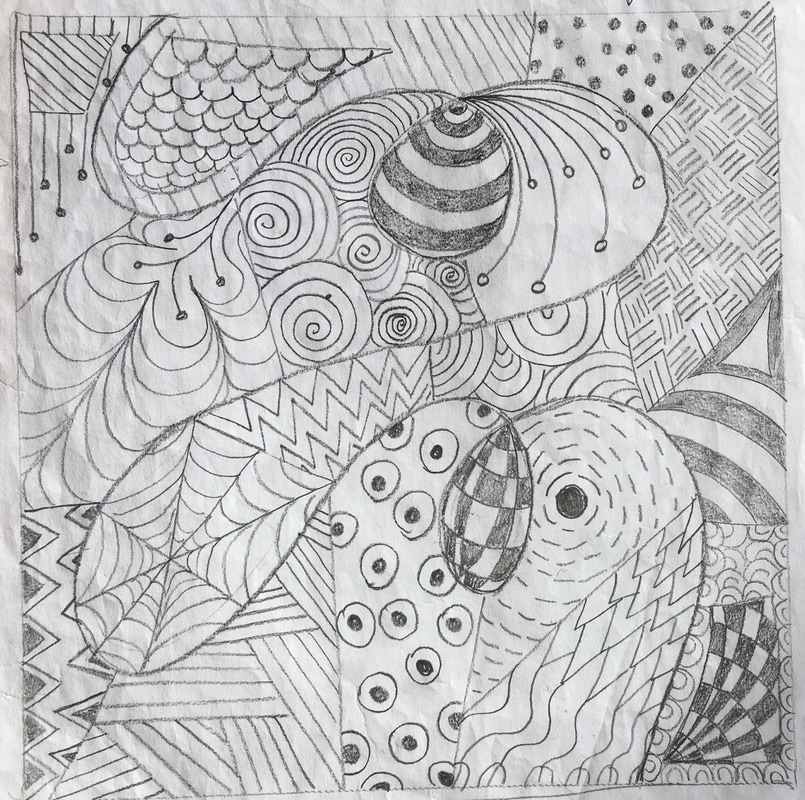
Practice Sheet-
Take a 8.5 x 11 sheet of white paper and fold it in half long ways. Fold the long way in half. Fold in half again. Now open paper. There should be 8 individual boxes. Using the texture example handout, draw an example of texture in each box. When finished, there should be 8 different examples of texture on the page.
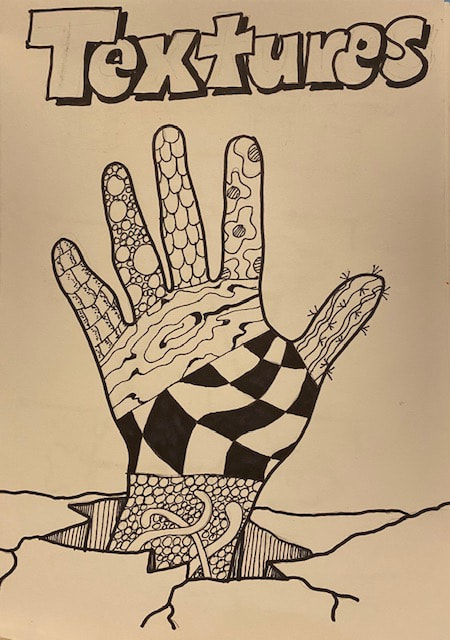
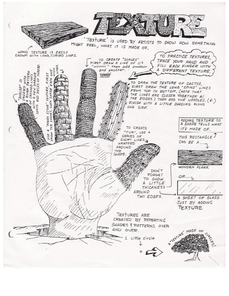
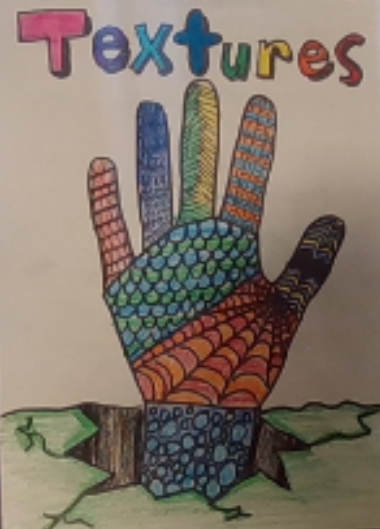
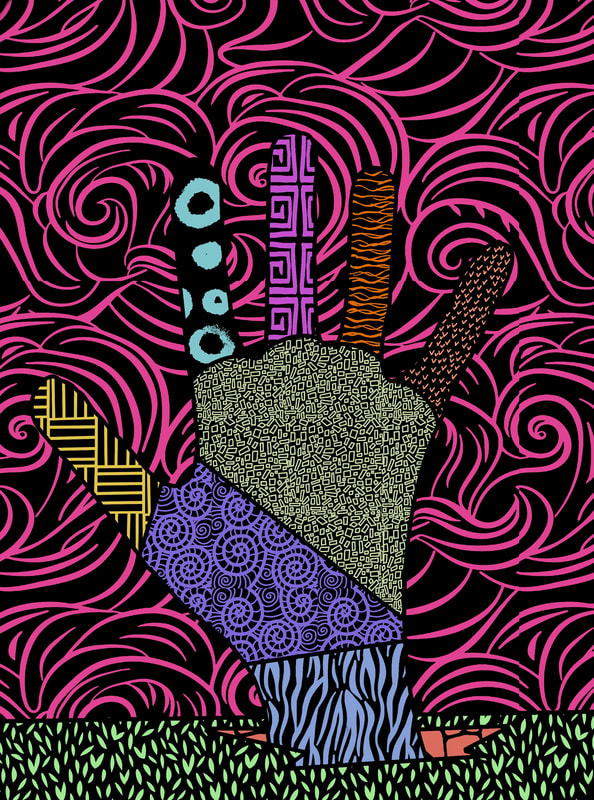
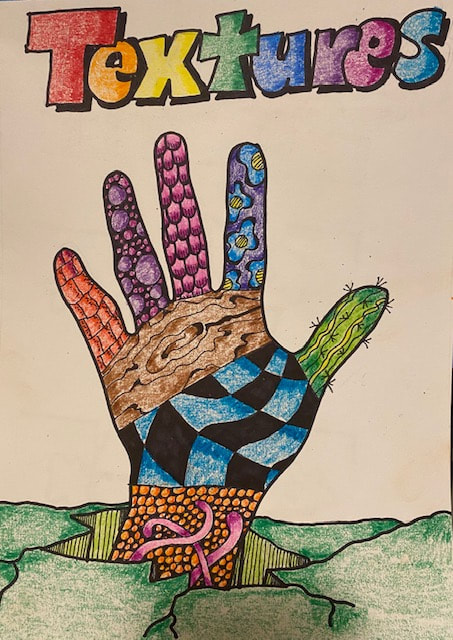
Project 1: Texture Hand-
Using 8 1/2 x 11 sheet of white paper or your sketchbook, trace the left and the right hand. Make sure to hold the pencil straight up to create correct lines. Once drawn, on the left hand, create a texture drawing for each finger as shown in the hand-out below. Create a space around the hand. (ex. coming out of the ground, submerged in a puddle, etc.) Now look at the Texture Example Handout and draw a texture for each finger on the right hand. Create a space around the hand. Print a copy of the hand-out if needed.
Practice Sheet-
Take a 8.5 x 11 sheet of white paper and fold it in half long ways. Fold the long way in half. Fold in half again. Now open paper. There should be 8 individual boxes. Using the texture example handout, draw an example of texture in each box. When finished, there should be 8 different examples of texture on the page.
Project 1: Texture Hand-
Using 8 1/2 x 11 sheet of white paper or your sketchbook, trace the left and the right hand. Make sure to hold the pencil straight up to create correct lines. Once drawn, on the left hand, create a texture drawing for each finger as shown in the hand-out below. Create a space around the hand. (ex. coming out of the ground, submerged in a puddle, etc.) Now look at the Texture Example Handout and draw a texture for each finger on the right hand. Create a space around the hand. Print a copy of the hand-out if needed.
|
Artist: Jay Conley -
You can purchase this handout at:https://www.teacherspayteachers.com/Product/Adventures-in-Drawing-Drawing-Elements-1999187
|
|
|
|
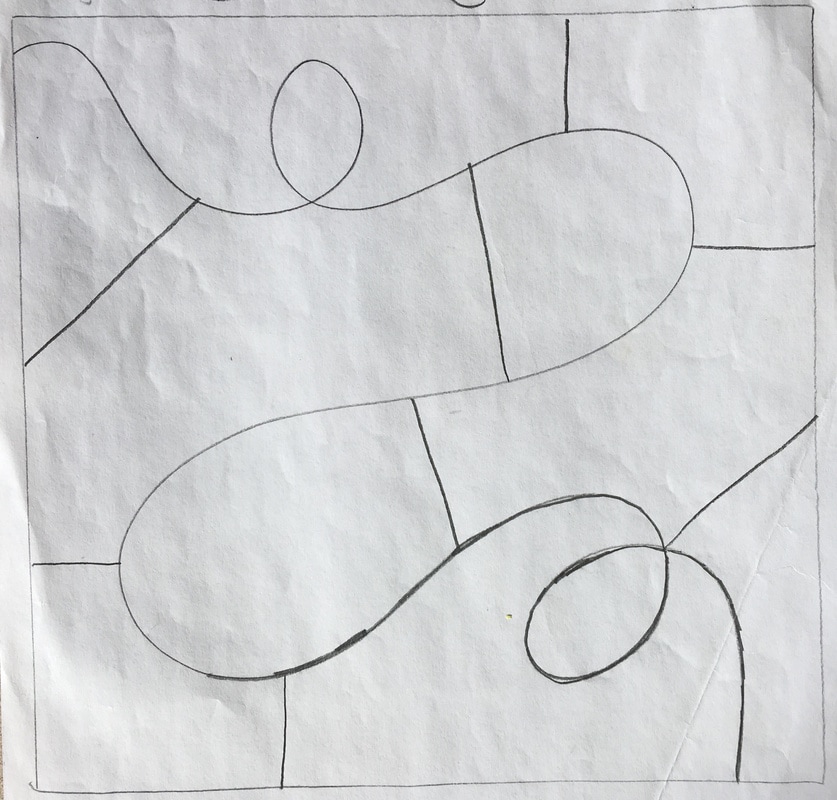
Final Project - Foil Texture Engraving
Materials -
Sketchbook and pencil
Tape
Card stock covered in foil.
Sharpie Markers
1. Cut card stock into a square.
2. Trace the card stock square into your sketchbook using a pencil.
3. Using a swirly line (see below), divide the space in the square. (pencil)
4. Draw lines from the swirly line out to the edges to divide the space up on the paper. (pencil)
5. Begin filling in each space with a different texture. (pencil)
|
|
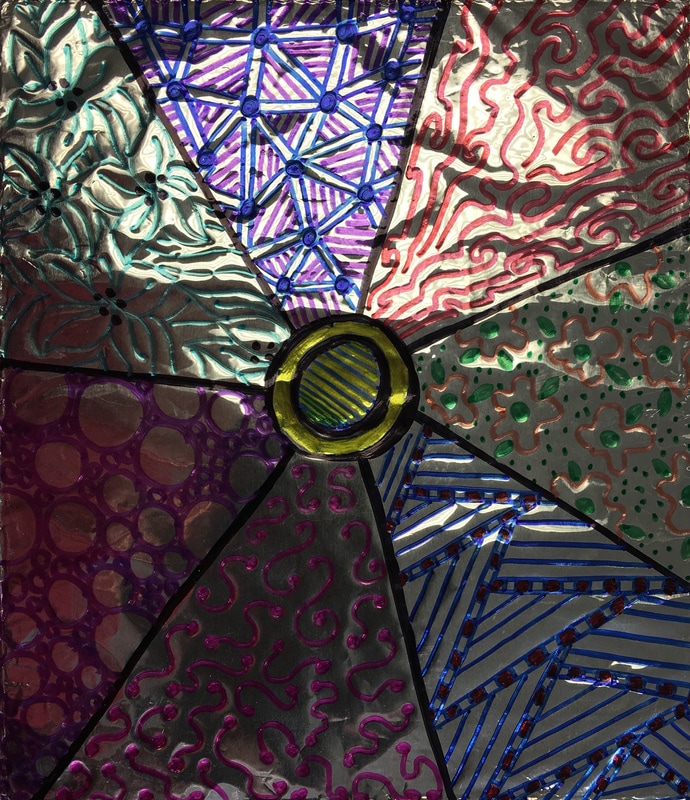
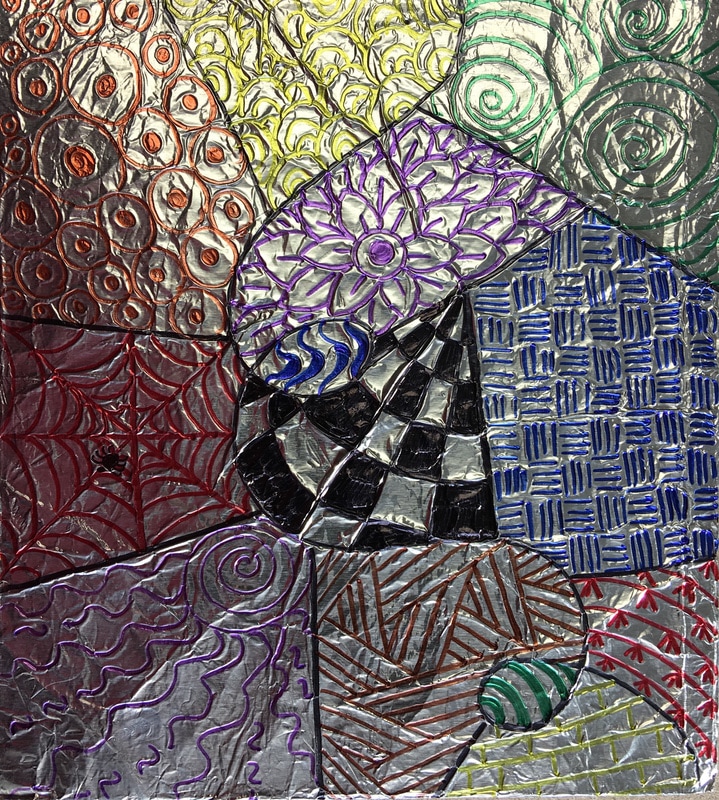
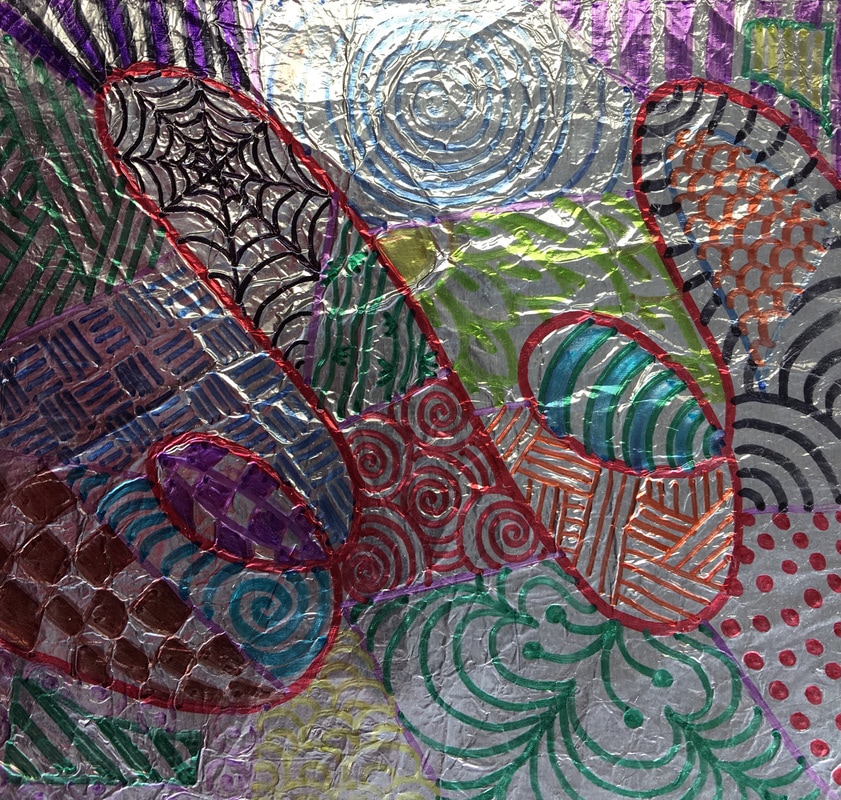
6. Once complete, cover the card stock with heavy duty tin foil. Make sure the shiny side is facing outwards. Fold the tin foil over the edges of the card stock and tape on the back.
7. With sharpies only (no pencil) draw the swirly line and dividing lines on foil.
8. With sharpies redraw the textures you drew in your sketchbook onto the foil. Make sure to use different colors.
See examples below.
7. With sharpies only (no pencil) draw the swirly line and dividing lines on foil.
8. With sharpies redraw the textures you drew in your sketchbook onto the foil. Make sure to use different colors.
See examples below.
|

|
|
|
SKETCHBOOK
This completes the Texture Unit.
- Draw 6, 2 x 2 squares in the sketchbook. In each square, fill the square with an original texture design created by the student artist.
- Draw a coffee cup and using one of previously designed textures, shade the cup.
This completes the Texture Unit.