Intro to Digital Art
Learning Target:
- I can create art using clipping mask, brushes, drop shadows and Gaussian blur.
To Do:
1. Watch the instructional video and follow along.
https://youtu.be/wpHwTi5hdks
2. Open Procreate and choose a square canvas.
3. Color first layer and create a second layer.
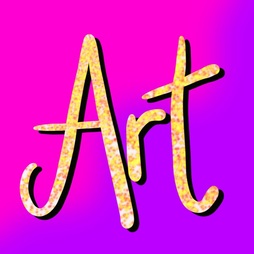
4. Choose Calligraphy/Script brush and write the word Art on the second layer.
5. Add a layer and choose Luminance/Glimmer brush. Change color and draw over the word Art.
6. Tap on layer and choose Clipping Mask.
7. Duplicate Art Layer and turn off top Art Layer by unclicking box.
8. Go to layer below and turn on Alpha Lock by clicking on blue bar and choosing.
9. Change color to black. Click on blue bar again and choose Fill Layer.
10. Click on white box to turn on the white Art layer. Go to Arrow to select that layer.
11. Drag to show shadow. Tap arrow to unselect.
12. Go to first layer and choose it. Click on plus sign to add a layer above it.
13. Choose Calligraphy/Monoline brush and drag across the canvas. Pull in a color to fill in.
14. Combine two color layers by pinching them together.
15. Select that layer and go to adjustment icon. Go to Gaussian blur and drag from let to right to blur the colors.
16. Go to wrench to save as a jpeg to your Chromebook/Computer.
- I can create art using clipping mask, brushes, drop shadows and Gaussian blur.
To Do:
1. Watch the instructional video and follow along.
https://youtu.be/wpHwTi5hdks
2. Open Procreate and choose a square canvas.
3. Color first layer and create a second layer.
4. Choose Calligraphy/Script brush and write the word Art on the second layer.
5. Add a layer and choose Luminance/Glimmer brush. Change color and draw over the word Art.
6. Tap on layer and choose Clipping Mask.
7. Duplicate Art Layer and turn off top Art Layer by unclicking box.
8. Go to layer below and turn on Alpha Lock by clicking on blue bar and choosing.
9. Change color to black. Click on blue bar again and choose Fill Layer.
10. Click on white box to turn on the white Art layer. Go to Arrow to select that layer.
11. Drag to show shadow. Tap arrow to unselect.
12. Go to first layer and choose it. Click on plus sign to add a layer above it.
13. Choose Calligraphy/Monoline brush and drag across the canvas. Pull in a color to fill in.
14. Combine two color layers by pinching them together.
15. Select that layer and go to adjustment icon. Go to Gaussian blur and drag from let to right to blur the colors.
16. Go to wrench to save as a jpeg to your Chromebook/Computer.